Sunday, August 28, 2011
Saturday, August 27, 2011
Hotchkiss 39 Light Tank for the BLA
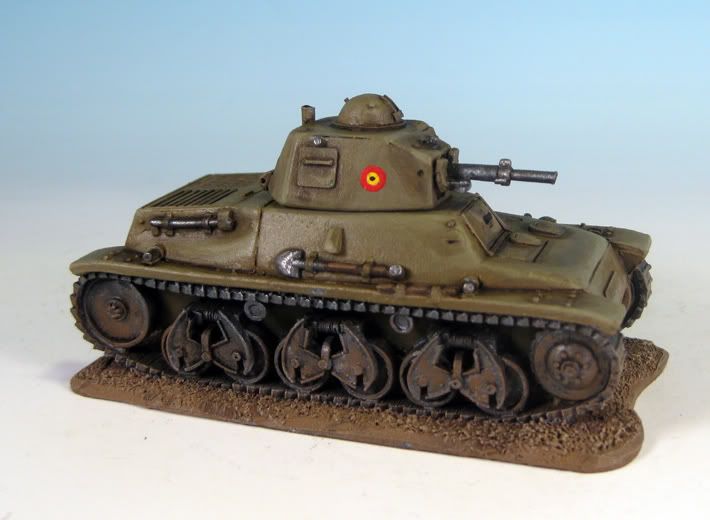
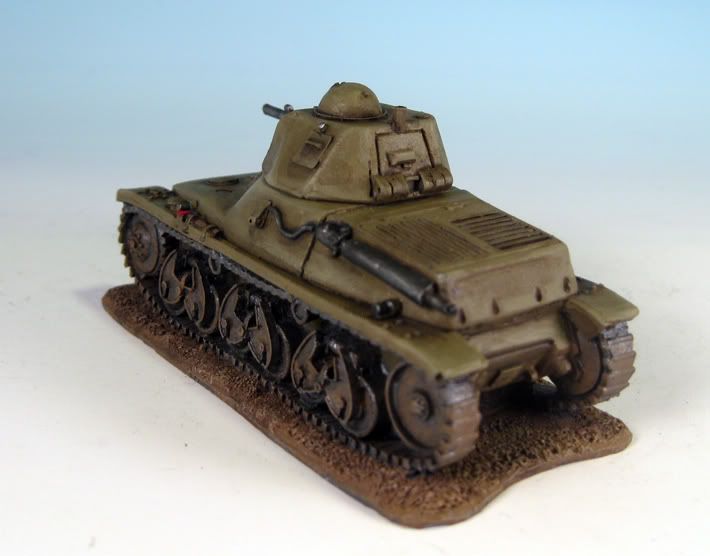
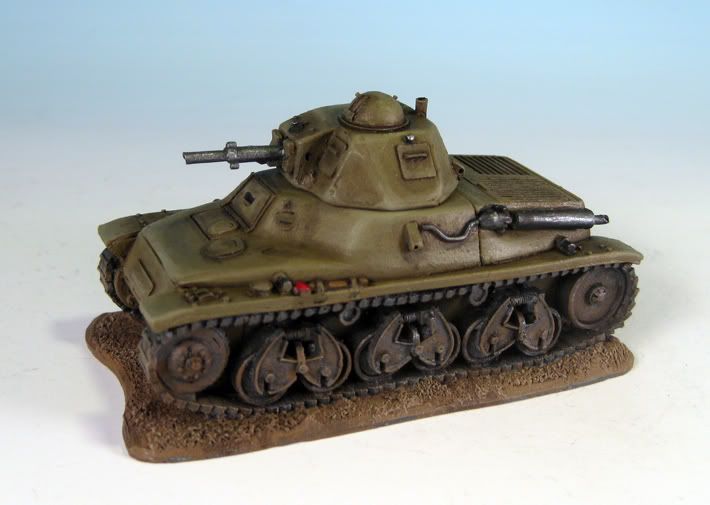
Though I have plenty of points in Gorillas and Monkeys for the Belgian Liberation Army, some games may get to enough points that I'd have room for an actual light tank, so since Brigade Games was having a sale I picked up a Hotchkiss 39 tank by Army Group North.
When you're used to heroic scale sci-fi tanks it's easy to forget that not all tanks were hulking monstrosities. Early light tanks might have had no issue with parking in the compact spots at the supermarket!
I've gone for a neutral, single-tone military shade here, as I'm not a real big fan of camouflage. It can look nice sometimes, but since the goal of camo is to confuse & break up what the eye sees, when done right it will do just that, and I enjoy looking at the miniatures.
So here's my H-39 for the Belgian Liberation Army:
And with Monkey for scale:
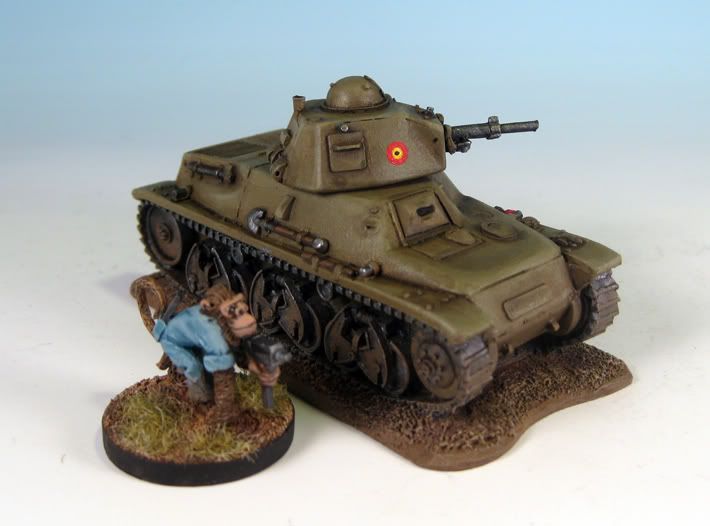

When you're used to heroic scale sci-fi tanks it's easy to forget that not all tanks were hulking monstrosities. Early light tanks might have had no issue with parking in the compact spots at the supermarket!
I've gone for a neutral, single-tone military shade here, as I'm not a real big fan of camouflage. It can look nice sometimes, but since the goal of camo is to confuse & break up what the eye sees, when done right it will do just that, and I enjoy looking at the miniatures.
So here's my H-39 for the Belgian Liberation Army:


And with Monkey for scale:

Labels:
Belgian Liberation Army
Friday, August 26, 2011
A Giant Opportunity
I just had to pass this information along.
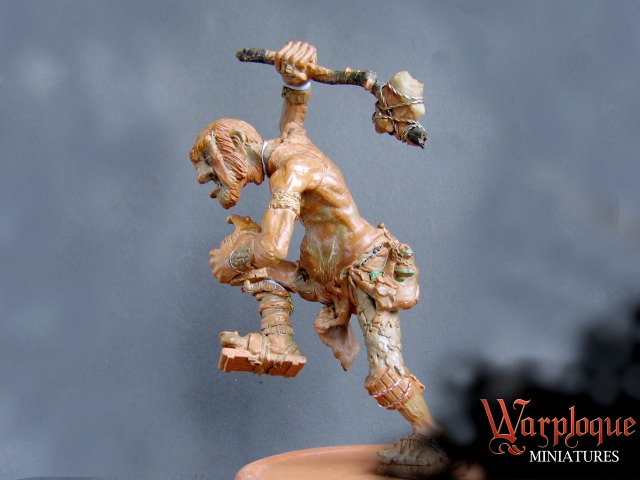
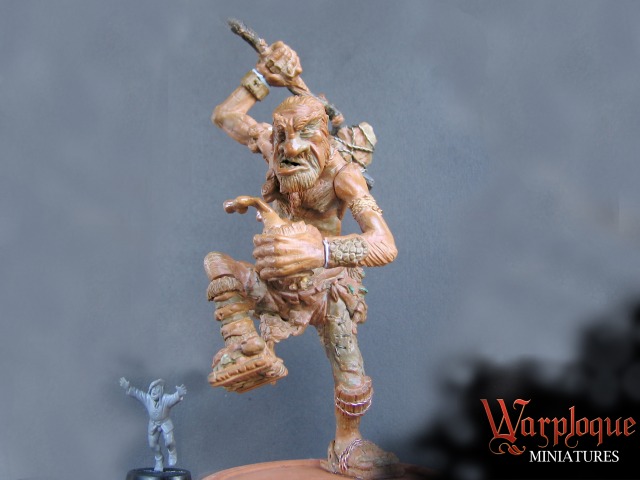
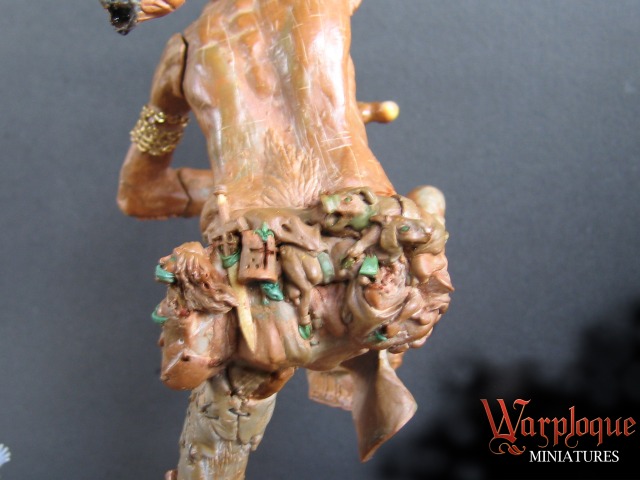
Alex of Warploque Miniatures recently finished another of his epic and amazing sculpts.
I'm always singing this man's praises. He's the one who sculpted the incredible "Hippo" troll I used in my Underworld Blood Bowl team. He's just finished his Giant, and since it's a major investment to cast it up for a small outfit, he's placed it on a site called ulule.com for pre-sales to make sure it's a viable project.
Can you find a cheaper giant? Undoubtedly. But you'd be hard pressed to find one with more character.
I think it is not only worth the sticker price for the quality of the piece, but you also have a chance to support an amazing new talent and his burgeoning independent company. It isn't easy to try to compete against the giants... even when you're sculpting a giant! Reason enough for me, even on my tight budget.
Disclaimer: I'm not associated with either of the companies involved in this. I'm just a believer in the future of this fine sculptor and a fan of his great miniatures.
The Cast-It-Up project can be found here: http://www.ulule.com/cast-up-the-giant/
Warploque Miniatures I've had linked at left under 'Places to Go' since creating this blog
And to see more of his sculpting projects and work in progress spend a day looking through his thread on The Warhammer Forum.
Now, on to the pictures of the giant!


Labels:
Reviews
Thursday, August 25, 2011
Blood Bowl Teams Hall of Fame
I have added a separate page to this blog, the Blood Bowl Teams Hall of Fame, to be a place to collect the team pictures for the various Blood Bowl teams I have painted, be they personal or commissioned.
While I enjoy painting miniatures of all types, there is something uniquely satisfying to me about a Blood Bowl team. I think it is the ideal size for a creative project with just the right potential variety & cohesion, a balance that makes for a fun project with its own personality.
The Hall of Fame you can find by clicking the tab below the blog's header.
Feel free to use this post as a place to leave any comments you'd like to for anything that is in the BBTHoF, since there is no way to have a comments section for a separate page, and the comments are shown to me by newest placed, not date of original post, so it will be easy to find your comment here.
Thanks for visiting!
Labels:
Blood Bowl
Wednesday, August 24, 2011
Zenithian War Rocket: Review & Tutorial: What is Cooler than a Car with Fins?
Answer: A Spaceship with Fins!
If you read Saga of the Missing Package, then you know I spent a good month eagerly awaiting some spaceships from Hydra Miniatures. Last night I could wait no longer. After several hours pinning some very tiny fiddly minis and needing time for some green stuff to set, I opened up the bags containing my Zenithian fleet. Shown above: 1 Zenithian Squadron (9 Class I & 3 Class II) and a single Class III & Class IV.
At the moment there are four different fleets available for the War Rocket line, each with Rockets designated as Class I, II, III & IV. The fifth fleet, Space Pirates, was previewed recently on TGN and are gorgeous.
Upon opening the bags of miniatures, this is what you find:
Taking a peek at the other fleet I purchased, the Imperial Fleet, these might be the most trouble free for assembly. The Imperial Class III & IV have several pieces to assemble while these have only a separate gun for the III & IV Class, and the I & II are single casting. As you can see the III & IV are resin while the I & II are white metal.
One thing I thought was very clever, is that in addition to the size of the ships being used to distinguish the Class, they also have a corresponding number of fins for it's class: The Class I Rocket has one fin, and on up to the Class IV with four fins. So in the depths of space if your scanners fail you and you're uncertain if the ship is large, or merely close: count the fins!
I was greatly impressed with the quality of casting.
There was a minimum of flash and mold lines. One of the Class I rockets had a small section of its fin that seemed to be incomplete: perhaps it broke in shipping, perhaps a casting flaw. It was the only example of this, and was not very significant. I'm handy with green stuff, so I just completed the fin myself. The resin was also very smooth. I saw no flaws at all with the Class III and only a few small bubbles along the edge of the rim on the Class IV: very easy to fill.
Close up of the top & bottom of a Class I Zenithian Rocket. Very little clean up work required. Beautiful.
First small problem I found was the flight stands. Plastic flight stands are notorious for breaking; snapping inside the connection of metal models. And as you can see the connection stub of the flight stand is far too thin for the connection hole. I first drilled one for this, and quickly realized it was a great waste of time for something that would only snap in due time. So I decided on this:
Clip the stub off the flight stand. It is then only a little smaller than the hole. Reinforce the bond with a touch of green stuff, glue with super glue and you're set. Not much Tutorial needed here: the design is simple and trouble-free. I did substitute a few flight stands of different heights, just to add some variety in mine.
Note: Do take care to line up the Rocket so that it faces forward with a flat edge of the hex base, not a point. If you plan to use them to play War Rocket this will be required.
The Class III & IV have metal flight stands and are a closer fit. The Class III is a little looser. Since flight stands tapers I clipped about an 1/8 of an inch off the top of the flight stand, making sure this wouldn't interfere when the ships are close: it doesn't: the larger class rockets are situated higher than the others.
Here is a completed Class I Zenithian Rocket. Simple & Stylish.
A sense of scale: Front Left: Class I. Front Right: Class II. Back Left: Class IV. Back Right: Class III
The fleet nearly assembled: just waiting for the Class III & IV to get their heavy front arc weapons.
The finished picture is at the top of this article.
I'm already thinking I should have got 2 Class III Rockets for each fleet.
I didn't know much yet about the War Rocket rules. What motivated me most was the appeal of the miniatures: I am a big fan of spaceship miniatures, and figured if the rules turned out to not be for me, then I'd still have nice miniatures for use in other systems. I haven't finished reading the rules fully, but have given a casual look through and an in-depth look at the mechanics of the various fleets to see what my two fleets are in the scheme of things in this game and setting. I chose the Zenithian and Imperial for form, with no concept of their function.
The first thing that caught my attention is how distinct each fleet is within a very simple game mechanic by the clever system of different movement types. Each fleet has its own movement technology, and so functions very differently from the others in-game.
The Zenithians are the inscrutable enemy of mankind. Very little is known about them and their technology is arguably the highest in the known galaxy. In game terms, this means they are the most maneuverable (even if not the flat-out fastest) of the fleets. The mechanic the rules use to represent saucer shaped spaceships is elegant and simple brilliance. They look like they'll be a lot of fun to field. They are also a bit on the brittle side, so if you enjoy, as I do, 'finesse' fleets, then you'll likely enjoy these!
The rule book looks very well done, nicely organized and though only black & white inside, the art is suitably retro and the black and white illustrations add to this, rather than detract. In the future I'll do a Review & Tutorial for the Imperial Fleet as well, and eventually a review of the game, when I get a chance to play it.
So how do I rate the Zenithian Fleet?
Rating:
Casting: 9/10
Cleverness of Design: 10/10
Aesthetics: 10/10
I'll be looking forward to painting these!
Labels:
Reviews,
Spaceships,
Tutorials
Monday, August 22, 2011
Gorilla My Dreams: rebasing the Dust Tactics gorillas & Review
When I first saw the preview pictures for the Dust Tactics Axis Gorillas I was floored. They really looked promising. They did look a little too large, but that was because I had (incorrectly) assumed they were on 40mm bases. If they had been, they'd have been indeed quite large. As it is, they are on 30mm bases and scale up perfect for 28mm miniatures.
A box set retails for $14.95 US.

I had experience with Dust Tactics with only one model: the Allied medium walker, which I did some minor converting for my Quar in a VSF setting. The walker was a very high quality kit and I expected much the same from the Gorillas.
Seen here are the gorillas out of the box with an AT-43 Karman for scale comparison.
The gorilla on the left I have already removed from the base (since I was re-basing mine).
The miniatures come pre-assembled and attached to their base.
In sculpt, the gorillas are much more like true gorillas in stance and proportions than the karmans, even discounting the karman armor.
The first thing I noticed about the gorillas was that the plastic is just a bit soft. The walker was hard plastic like you'd expect from most plastic miniatures, but the gorillas are a softer plastic, nearly as soft (but maybe not quite as soft) as you might get from the Reaper Legendary Encounters. I was surprised, and I have to admit a bit disappointed. However, I've used the Reaper Legendary Encounters and repainted them and found they work fine, so I didn't let it dissuade me.
One issue with the softer plastics to note is mold lines: they are generally thicker and a bit harder to remove than on hard plastic miniatures. Luckily there were very few mold lines, and the only troubling ones were around the details on the metal gauntlets.
The detail is sharp, well defined and should paint up very easily with quick washes & drybrushing if desired.
The bases are the same as standard Dust Tactics infantry: metal decking.
The hands of the gorillas will rotate, because they are just pushed on, not glued in. You'll probably want to glue these in, using super glue not the plastic adhesive used for standard plastic miniatures.
Hint: Before gluing the hands, first remove them completely by pulling them off and clip or shave a sliver off the rod stump that inserts into the hand: this is because it has a mold line and prevents the gauntlet from resting flush with the arm. Trim a little off and you'll be fine.
Evaluating the kit as it is, I think it is very good quality for the money. I wish the plastic had been hard plastic, but the miniatures don't really suffer from the softer material.
Rating:
Casting: 9/10
Cleverness of Design: 8/10
Aesthetics: 10/10
Now on to what I did with my gorillas...
When I came up with my plans for the Belgian Liberation Army it was in large part due to the fact that I wanted to buy these gorillas. I wanted the bases to match the men & monkeys I'd already done, so first thing I had to do was remove them from their bases and pin them to flat 30mm bases. This was easy to do. The soft plastic doesn't resist drilling, and they pinned fine.
Then it was a simple matter of painting them. I tried to go for a natural gorilla look, with some grays & browns in the black and slight sliver-backed look to them.
Out of the Congo and ready to push Nazis out of Crimea.
I can't wait to get these on the gaming table!
Rules wise, the three gorillas are using the 3 werewolf pack profile while the AT-43 gorilla is 'Agrippa' using the profile of the alpha-werewolf. The little fellow in front is a stow-away from my Hydra miniatures package that the post office tried their best to lose.
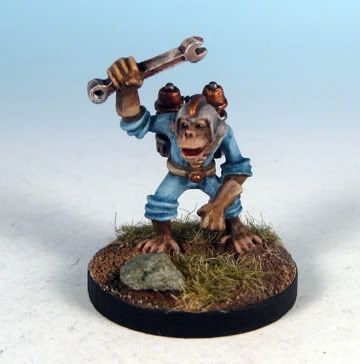
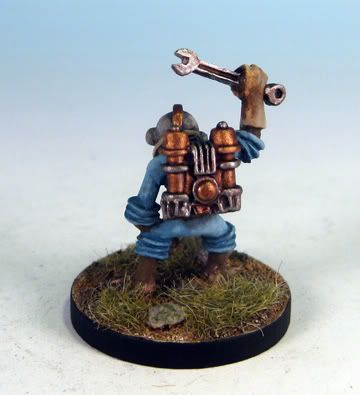
This is Sprocket. He'll be my pilot of the Greystoke walker! The boys affectionately call him 'Monkey Wrench", but not when Poireau is in ear-shot. Pun or not, he gets annoyed when people miss-classify apes as monkeys.
Question: My 3 new gorillas need names! Any suggestions?
Labels:
Belgian Liberation Army,
Reviews
Sunday, August 21, 2011
Old West: All in a Day's Work for Bandidos: Battle Reports pt.II
When we last left our (erm) 'heroes' they'd just returned to the pueblo which El Rojo uses as his personal fiefdom with the hard-earned loot from the morning's bank heist. One of his men had selected a strong looking peasant lad to replace the man who'd been killed and Rosarita slipped in and out of consciousness from the effects of her 'medication'. Feliz told her not to worry, he'd find the peddler and gut him for her.
Always a softy that Feliz.
But as El Rojo and men made their way piecemeal to the center of town, it became clear that some interlopers were hunting the town, looking for them and their gold!
Cowboys who'd decided it'd be easier to rustle his men than cattle? They'd soon learn better.
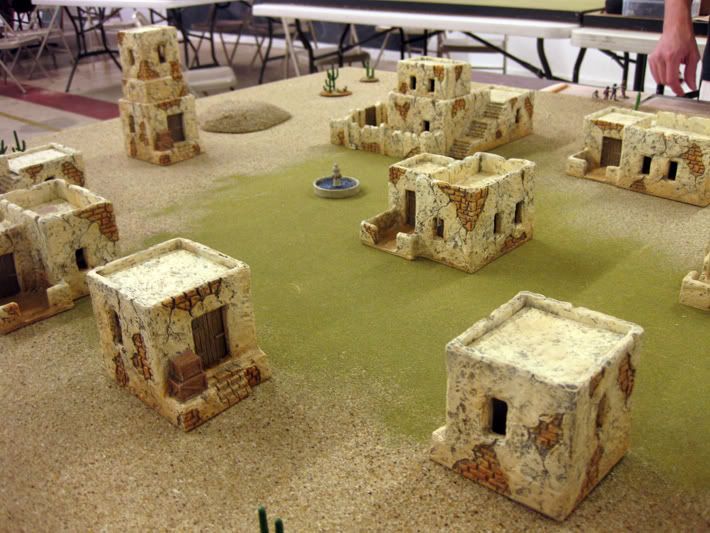
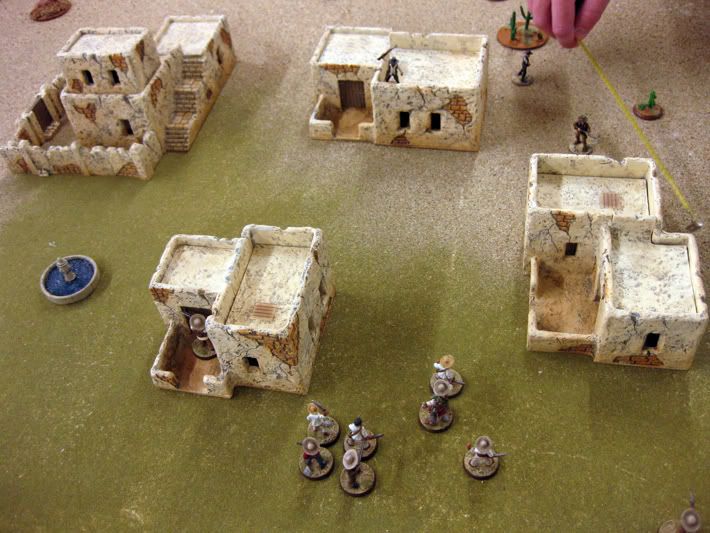
This is the pueblo of Leche de Cactus, before the violence erupted.
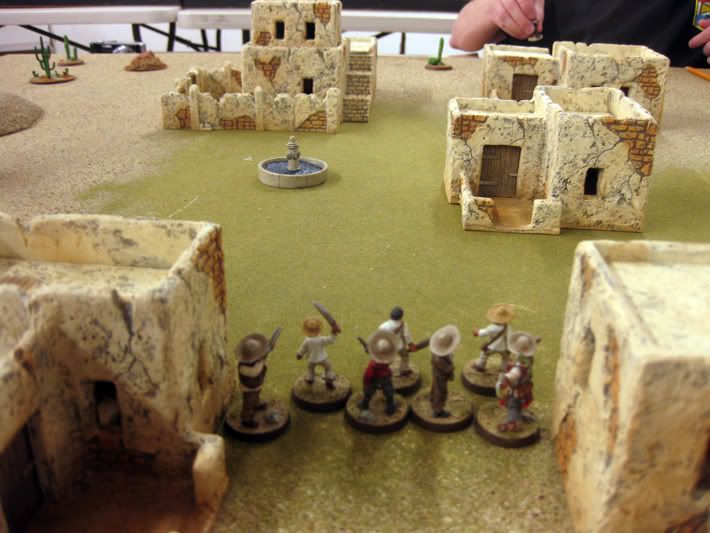
El Rojo, Feliz (with his new rifle), Julio Iguana and a tough make their way toward the center of town with a few peasants to run interference, while the rest of his gang have not yet arrived.
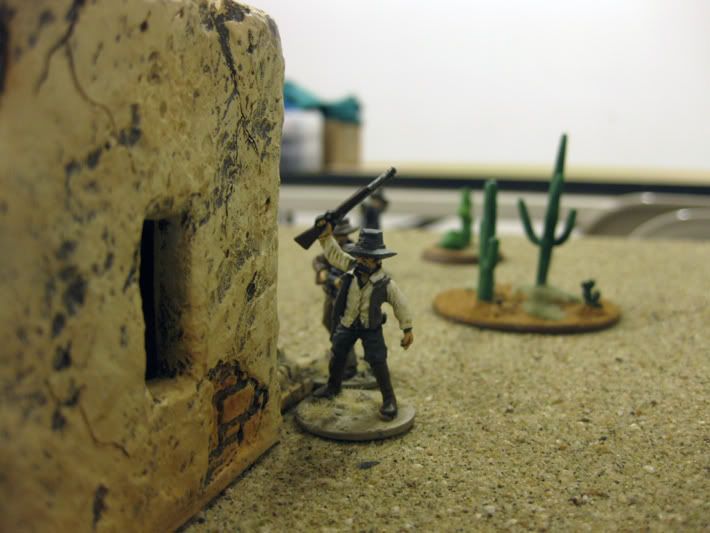
A couple of the Riflemen of the gringos make their way around a building in secret.
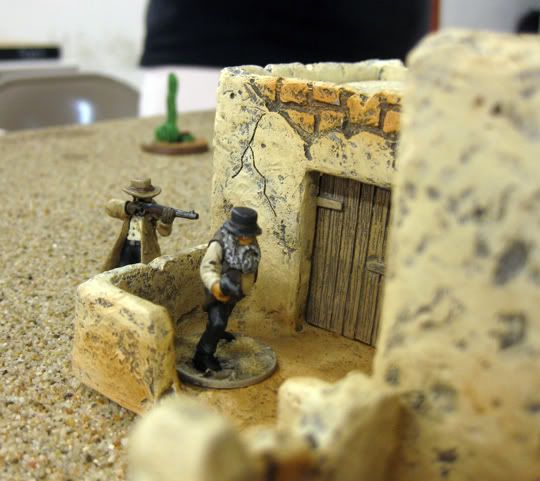
At the other end of town Pappy and the Rancher move to take cover in a domicile's courtyard
A buzzard circles overhead, impatiently awaiting his next meal.
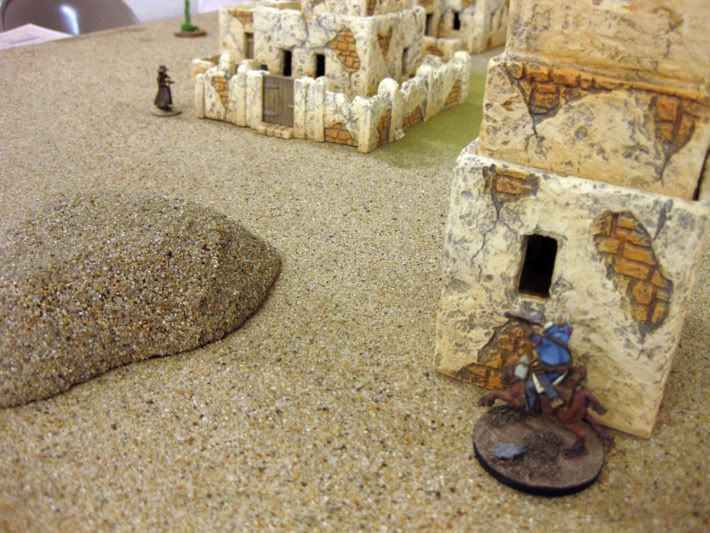
A Vaquero gallops onto the scene, taking cover behind a building from any rifle fire, waiting for his campagnero to catch up.
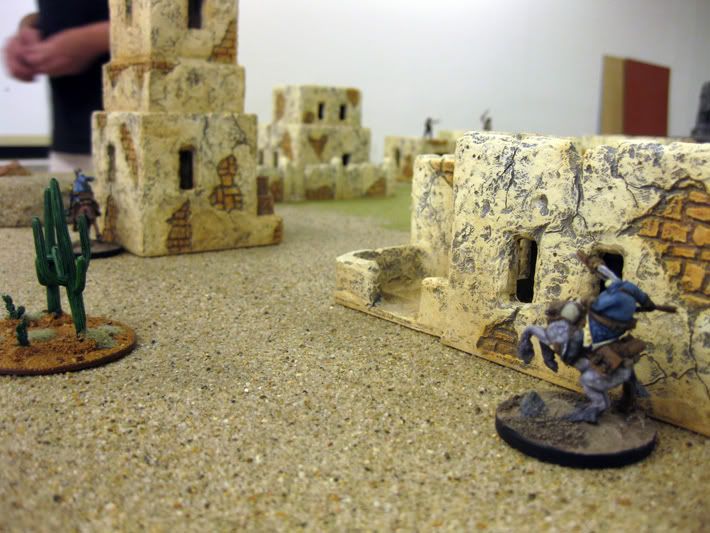
The second Vaquero is not far behind.
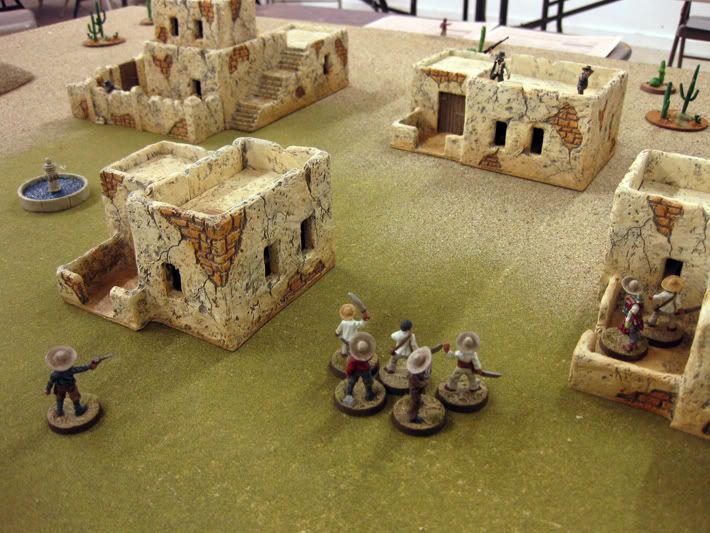
As the Cowboys took secure positions, the layout of the town required the bandidos to boldly move in the open.. behind their peons.
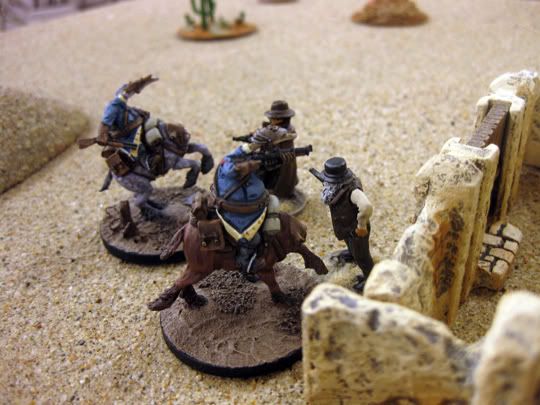
The Vaqueros manage to rope the cowboys and haul them over the wall to attack them close. You'd think cowboys would have anticipated some finer ropin' skills.
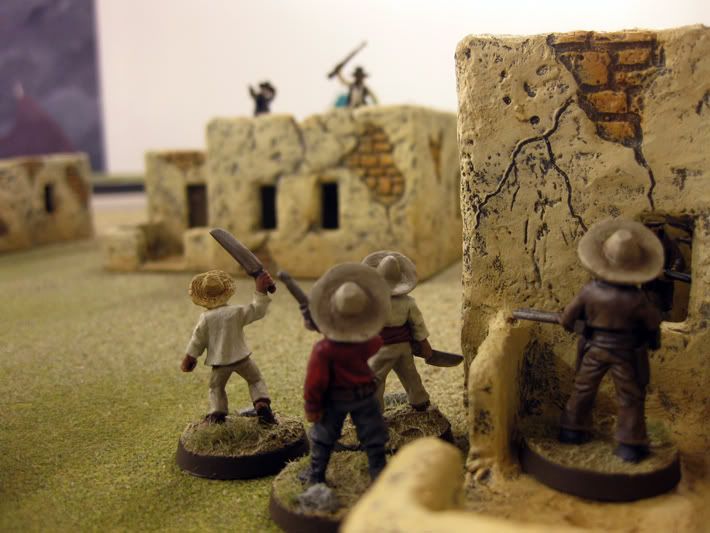
A shootout begins.
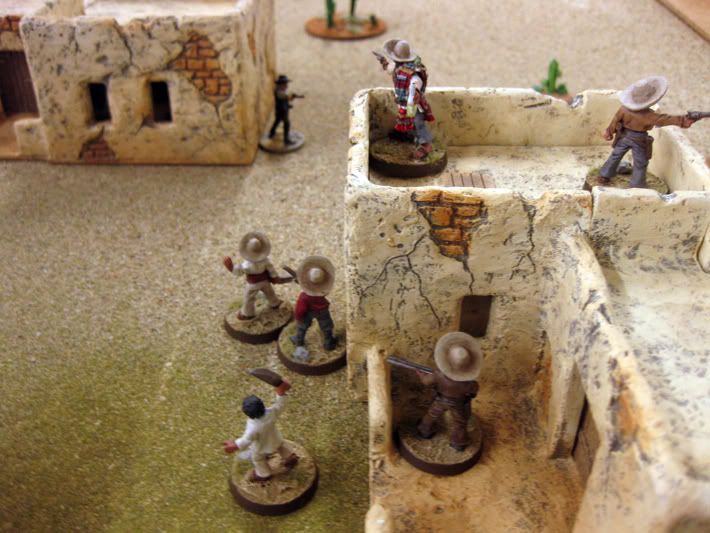
The bandidos dispatched a cowpoke who was in the house, then took to the roof to get better shots. Meanwhile El Rojo moves in for some close action.
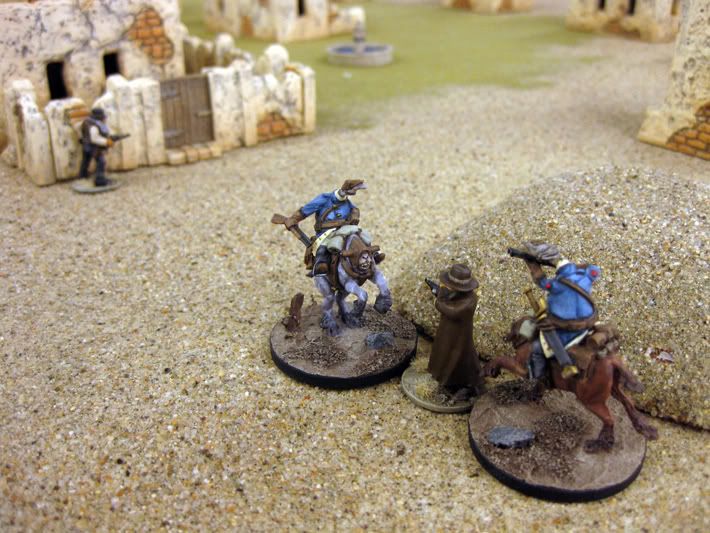
With the ornry Pappy proving difficult to bring down, the cowboys split up. Not being fooled, both vaqueros head after the leader, rope him a second time and try to horse-stomp him. (horse? pretty sure those aliens are riding giant capybaras!)
The Rancher took out one Vaquero before being knocked out himself, and the rest of the town was cleared of cowboys, leaving only Pappy left, who took it in mind to skedaddle.
Afterwards
No real lasting damage was done to either team, but benefits are yet to be determined: the store was closing soon at this point, so we decided to save rolling for cash, finding rare items & skill rolls for next time.
It was a great game, and like so many games of this sort it was very close until it wasn't.
Labels:
Battle Reports,
Legends of the Old West
Saturday, August 20, 2011
Blood Bowl: Dark Elves Green Goblin Style
The most recently finished team went out. They were very fun to work on. The client converted the team and had the idea to do them in a uniform style similar to the 'Green Goblin' from Spider Man. I always enjoy doing something different! Soon after starting them I thought about possible coaches & cheerleaders and had the idea of taking the theme to it's logical conclusion: skyboards. And how about sculpting a flaming pumpkin in his hand? The client's response? 'Awesome! how about flaming pumpkins for tokens too?' Couldn't agree more.
So here's the result:
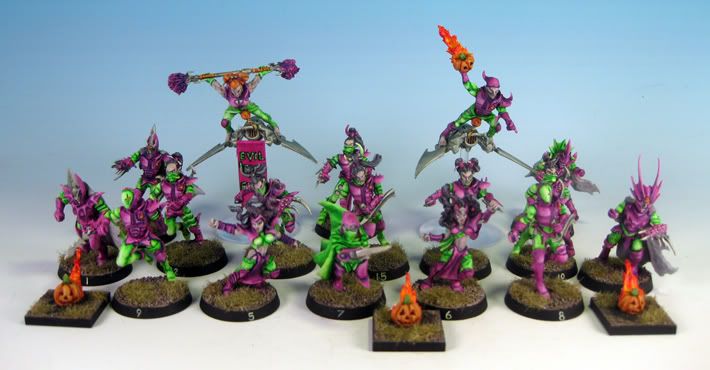
Some of my favorite individuals:
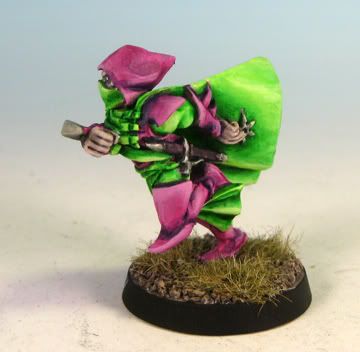
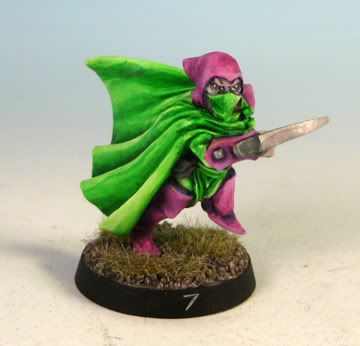
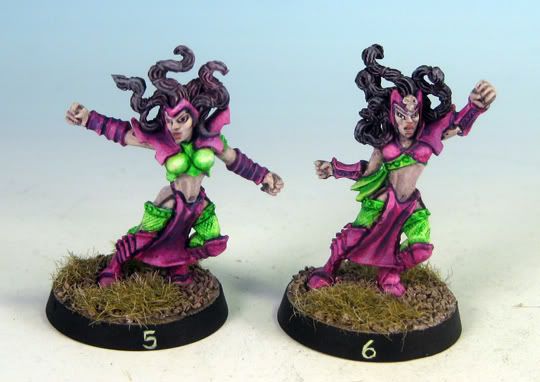
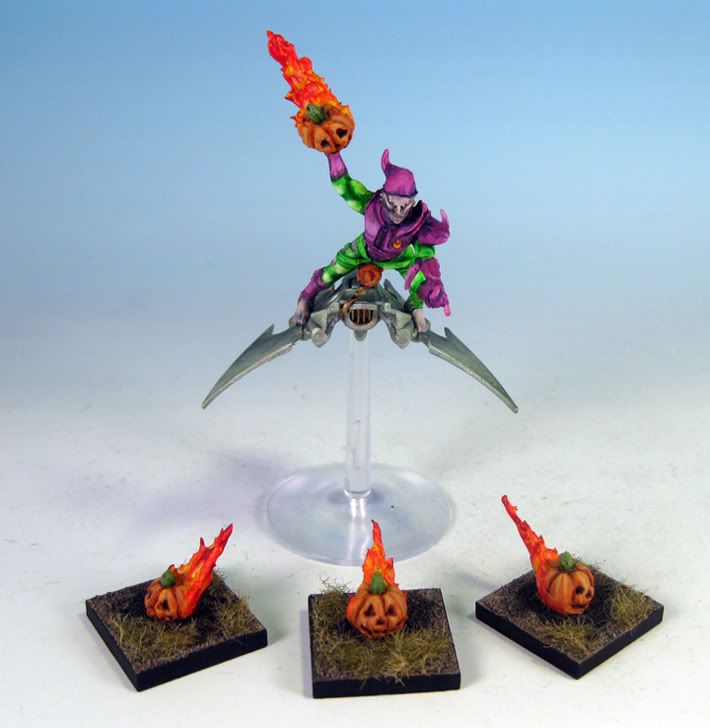
I have some very interesting teams lined up for the near future. I had already dubbed this 'the year of Blood Bowl' and looks like there is no letting up with the fun teams people have in mind.
Because of the volume of Blood Bowl lately, I've added a separate page to this Blog, just for Blood Bowl teams. An archive to collect the team shots. It's right at the top, so feel free to click it!
So here's the result:

Some of my favorite individuals:


I have some very interesting teams lined up for the near future. I had already dubbed this 'the year of Blood Bowl' and looks like there is no letting up with the fun teams people have in mind.
Because of the volume of Blood Bowl lately, I've added a separate page to this Blog, just for Blood Bowl teams. An archive to collect the team shots. It's right at the top, so feel free to click it!
Labels:
Blood Bowl,
Conversions
Subscribe to:
Comments (Atom)


